


What is Light Painting? (How to Draw with Light + What You Need)
Find out all the tips and tricks with Light Painting in this must-read guide. Learn how to get started or take your shots to the next level.
Light painting is such a fun and creative tool to use in photography. In this guide we will explain how to approach and explore the subject.
We will also give advice and tips on settings and locations and explain the photographic techniques you can adapt to light painting.
By the end of this article, you really will be ready to start ‘painting with light’!
What is Light Painting?
Light painting is not a new type of creativity. Ever since the dawn of civilisation, people have picked up burning sticks from a fire and sketched patterns against the night sky – these can be seen as the first light paintings.
Fast forward much more than a few thousand years and Light Painting has become a mode of creating images for photographers, performers and artists.
Light painting is incredibly varied and goes by several different names – ‘light drawing’, ‘painting with light’, ‘light art’ – but ‘Light Painting’ is the most commonly used term in photography.
As the name implies, it is essentially drawing with light. It is used to describe an image created by ‘drawing’ or ‘painting’ with a moving light and capturing it on camera, usually with a long exposure. Emphasising the link between photography and art the moving light is often called a ‘brush’.
As far back as the 1930s, Surrealist Man Ray was scribble-writing with light over a self-portrait and the great American dance photographer Barbara Morgan produced some of the first abstract light painting photographs using black and white film.
We should remember that the word ‘photography’ means ‘drawing’ (graphe) with ‘light’ (photo). From the 1940s onwards, even Pablo Picasso experimented with an electric light pen – see Gjon Mili’s renowned photographs of Picasso’s light painting.
Moving a light in front of a camera is only the start – try moving the camera or have the subject move – and there are so many light sources you can use for light painting photographs. From sparklers, LED strings or headlights to purpose-made ‘light sticks’.
However, you don’t need to create the light yourself. You can also use ambient light from street lamps or the headlights of passing traffic at night.
So from here, we look at light painting set-ups, techniques and tips. So by the end of this guide, you will be able to go out and try light painting tomorrow, if you’d like to!
Creative Light Painting Techniques
First off, four basic light painting set-ups you can use. Some require you to create light – others use ambient or natural light.
All are easily accessible and achievable for anyone with a camera (or even a phone!). Some may require a tripod and some other accessories – but all should be relatively inexpensive.
- Kinetic Light Painting
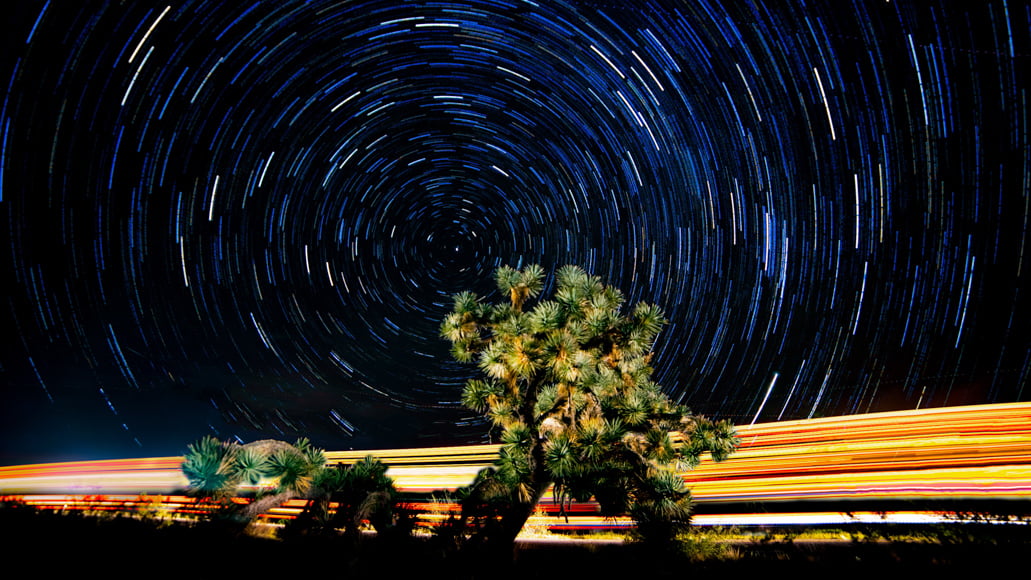
This is the easiest light painting technique to try out in light art photography. By kinetic light painting, we mean you keep the camera moving with a long exposure, exposing from a fixed light source.
The important part of this technique is that it is ‘kinetic’ – this relates to the movement of the camera, not the light.
You could use any light source to try this: a candle, a street lamp or the moon. For an effective kinetic light painting, it’s best to try to avoid other light sources when photographing, other than the one you’re concentrating on.
The moon shining out of an otherwise dark sky, or a candle and a dark background would be a great starting point. Move the camera quickly or slowly and the effects differ. You can paint simple words – or kinetic light painting of love hearts and other symbols are also fun.
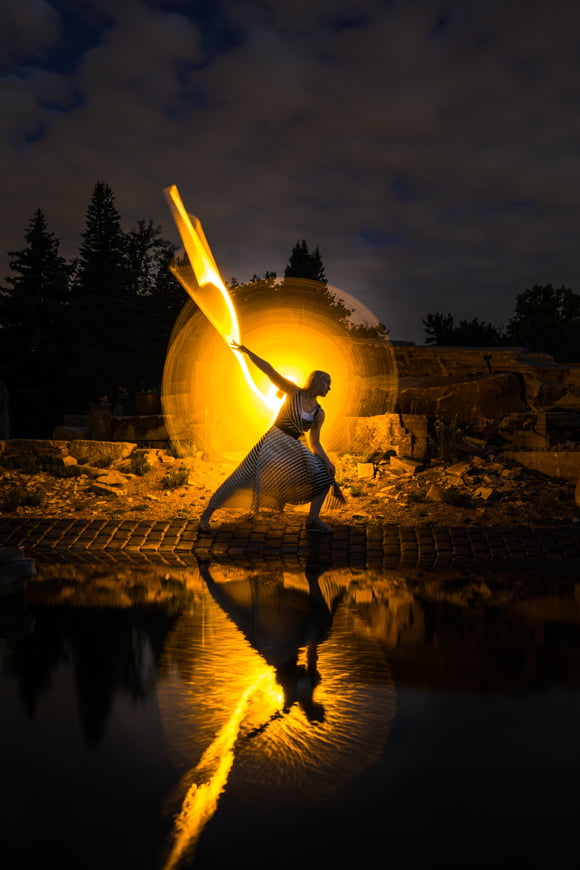
- Light painting with on camera light source
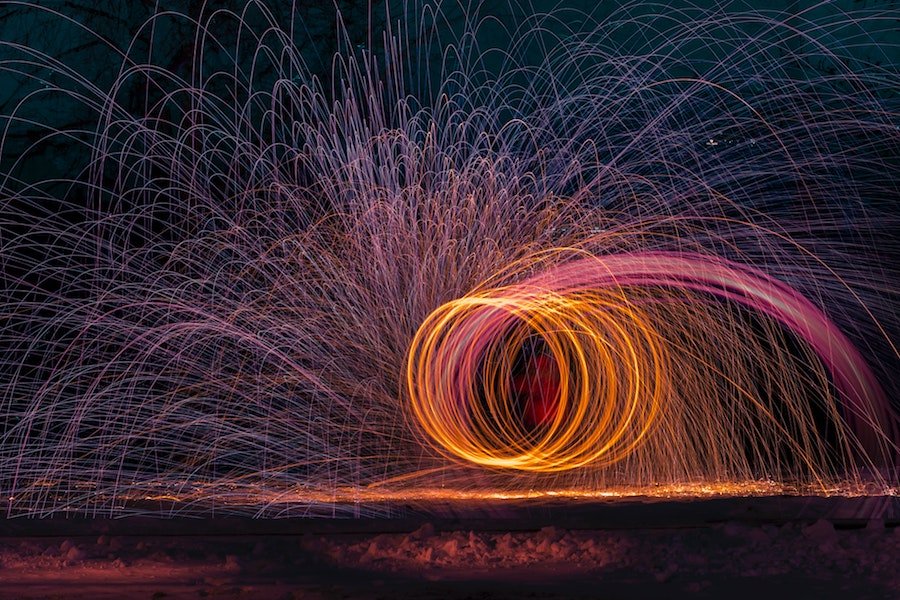
This technique is achieved using a tripod. You keep your camera in a fixed position, then move your lighting source so it can be seen on camera.
By shooting a long exposure, you will see the effects of the light source moving. You can use sparklers, a torch or glow sticks which can be bought quite cheaply. On the more expensive end of the spectrum is specialist light painting LED light sticks.
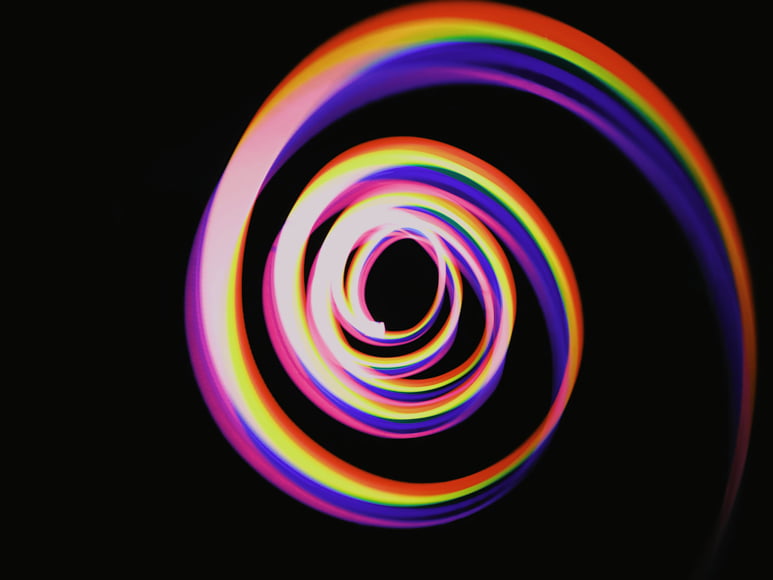
This ‘on camera’ light painting technique will create a smoother image than the Kinetic technique. Swirling, spiralling lines of light being favourites. It also allows you to introduce other elements into your images, such as people or buildings.
How Much Do You REALLY Know About Photography?! 🤔
Test your photography knowledge with this quick quiz!
See how much you really know about photography...

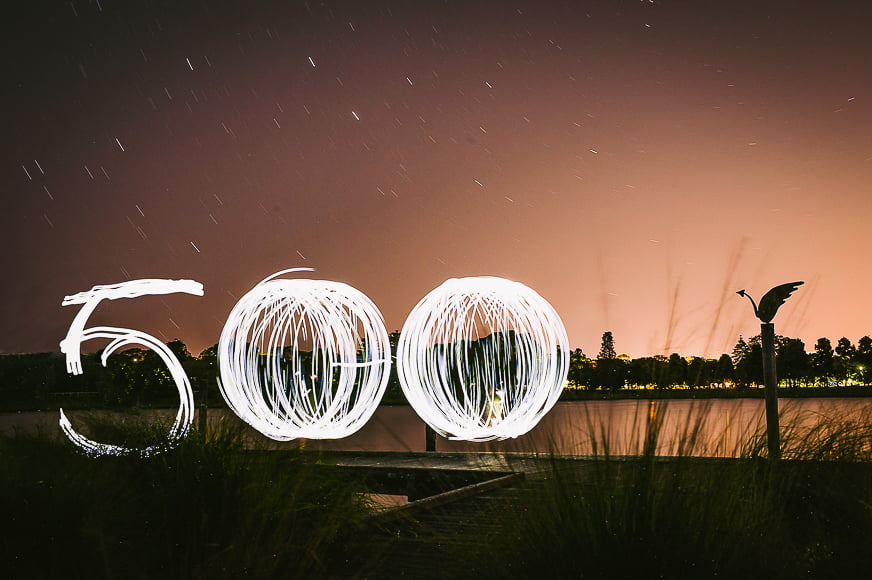
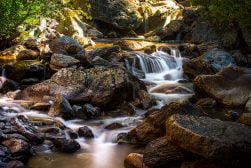
- Light painting with the light source off camera
Here’s another cool technique when doing painting with light photography. As above, this technique uses a tripod. However, rather than showing the light source directly by showing its movements, this technique is all about showing the light created but not the source.
This is less about lines of light and more about lighting up areas of an otherwise dark scene.
To achieve this effect, you would project light into the scene you are photographing – but you would not directly see the source of the light in the image, only the light it produces. Weaving light in and out of trees for instance.
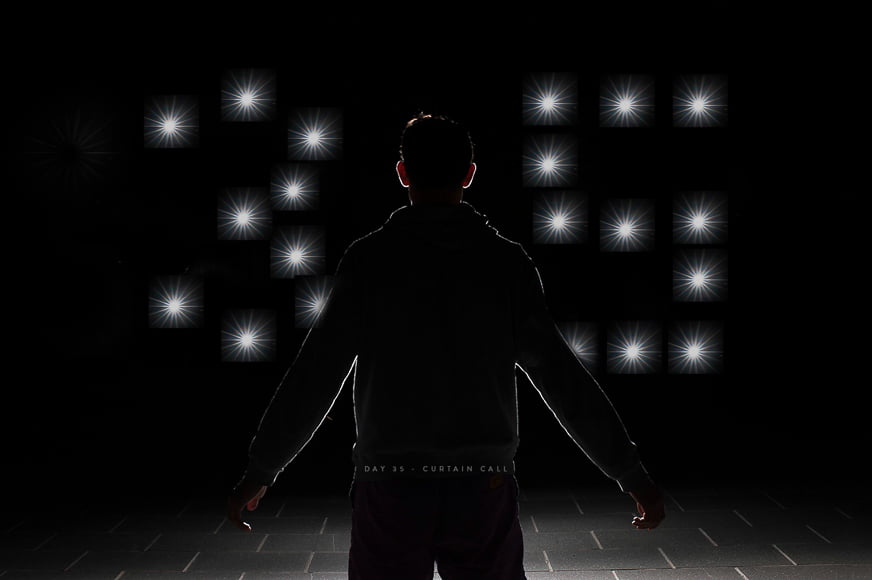
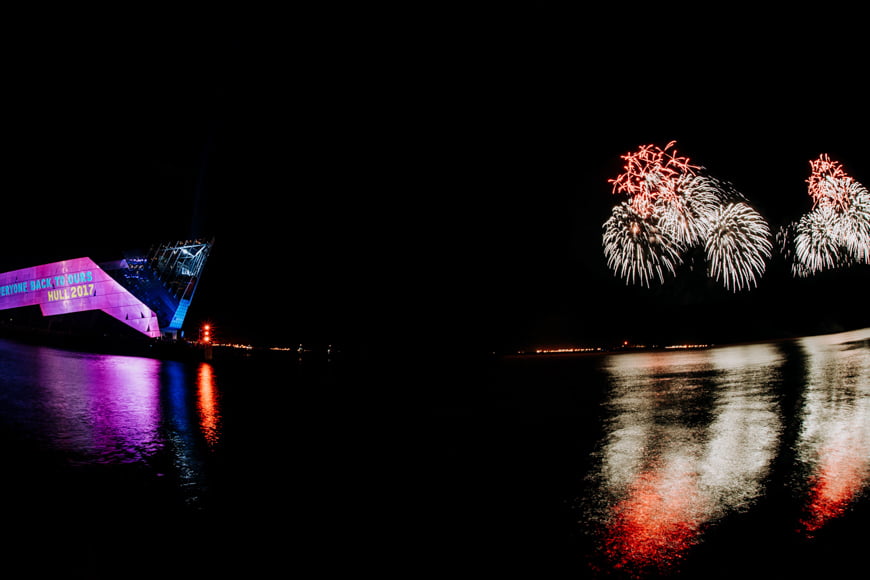
- Light painting with projections
This was extremely popular in the art world in the 1960s using slide projectors. The technique is often used today in advertising, art and performance using a data projector.
Images or words in a range of colours can be projected onto still or moving surfaces.
Messages are often projected onto buildings and walls like virtual graffiti. A favourite subject for light painting is projecting images, writing or strong patterns onto a face, hands, a body or a dancer.
Projections can enhance the subject, bring out the patterns and structure of a building or create an interesting contrast – water or clouds on a building or microscope images on a body.
It is the photographer’s job to select, focus and expose new images from the light show.
16 Tips for Light Painting Photography
Below you will find sixteen light painting tips to get you started along with ideas to spark your creativity.
These will enable you to develop your light painting skills and help encourage you to find your own style and subjects.
1. Prepare Your Light Painting Tools
So you may be asking yourself: “What do you use for Light Painting Photography?”.
Below we look at the best light painting tools you’ll need to get started with Light Painting.
- Camera – you’ll need a camera that allows you to shoot manually.
- Light sources – this is where you can make choices to suit the images you want to produce. You can use natural light sources such as the moon or all manner of artificial light sources such as sparklers and torches. There are many types of ‘light sticks’ on the market from extremely cheap to very expensive! You can even create light by attaching a string of LED lights to a bamboo stick and off you go! To alter the colors of your lights, you can use color gels.
- Tripod – if you are using the ‘kinetic light painting technique’ you won’t even need a tripod. But for all the other methods of light painting, putting your camera on a tripod is a prerequisite for sharp photos.
2. Dial in Your Camera Settings
Getting your camera settings right is essential for light painting and long exposures are an absolute must. Below we explain some typical camera settings, including shutter speed and focusing. These should help get you started with light paint photography.
- Format – set to RAW to enable you to have as much control over the image in terms of detail retention in the edit. It will also give you the best quality image.
- Mode – select manual mode on your camera. It’s really important that you have complete control over your exposure time.
- Aperture – this really depends on what you’re shooting and what you want to achieve. Against a dark background making patterns with sparklers or a small torch will probably work well with a high aperture and the subject in the mid-distance. However if you want to show more of the scene, shoot with a shallower aperture. We recommend starting at F5.6 – as it should enable you to get sharp images and account for different plains and depth in your image – and then experiment from there.
- Shutter – start your shutter speed at 30 seconds and adjust from there to find your base exposures. You may need far less – or longer, in bulb setting mode. It all depends on what you are shooting – if you’re including a person in your image, a 30 seconds shutter speed can be a very long time to ask them to stand still. Remember to use a remote shutter release, or use your camera’s in-built timer which you can trigger with your shutter button to avoid any movement.
- ISO – keep the ISO as low as possible to reduce noise when shooting long exposures at low light, so start at ISO 100.
- Focusing – ensure you are in manual focus mode, and use your lens’ focus ring to make minor adjustments. If you have a mirrorless camera, you can experiement with focus peaking too. (By avoiding auto focus, your camera won’t try to refocus when you come to take your shot.)
3. Wear Dark and Non-reflective Clothing
If you’re going to be the one moving within the camera frame, make sure you wear dark clothes and make sure you keep moving.
If you are more cautious with your movements and you wear bright clothes, you may show up in your image, seemingly as a ghostly presence. This is of course something you will want to avoid.
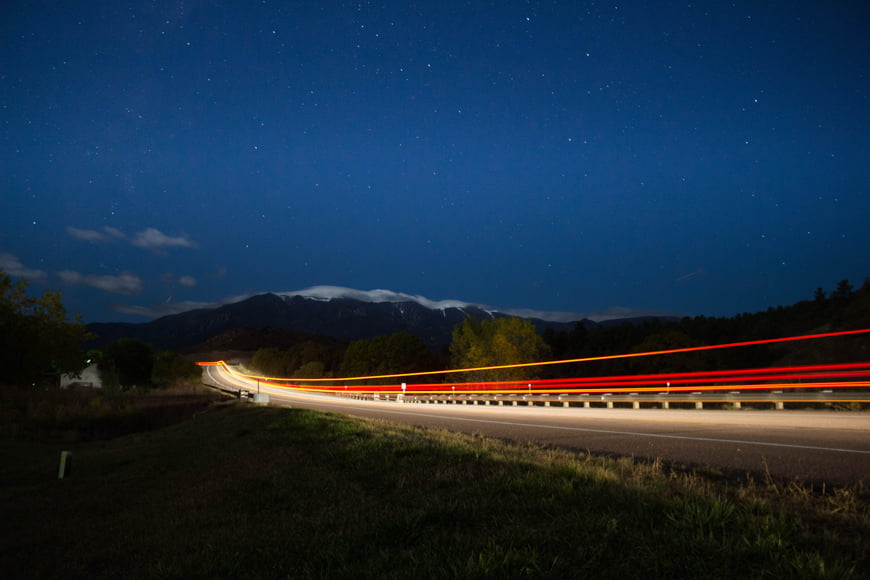
4. Try Shooting from a Moving Car to Capture Light Trails
Credit: Avery Lewis
You can capture light trails and streaks from passing vehicles, using a tripod on the side of a road or on top of a bridge. However, you can also shoot from inside a moving vehicle.
There are two tips here – but first and most importantly, ensure you’re the passenger, don’t try this if you’re driving.
The first way to try this would be to hold the camera steadily as the vehicle moves. Some camera shake will be unavoidable here. The camera effect can actually add to the effect though, so don’t worry too much about this.
Secondly, you can buy a tripod specifically designed to affix to or inside a vehicle. This will enable you to get a steady long exposure shot.
5. Have Someone Assist You so You Can Concentrate on Photography
Credit: Reid Zura
If you’re taking an image with a tripod and a moving light source and you are able to find someone to assist you, this can be a real help. This way, you can concentrate on settings and taking the image you want to.
You can also survey the scene and watch how the assistant moves – then direct them as needed.
6. Use Your Timer Release If Shooting on Your Own

Credit: Reid Zura
If you choose to shoot on your own and move the light source yourself, you may want to set the timer release up on your camera. This will give you some time to get into position – just start moving as soon as you hear the shutter release.
Even if you’re not going to be ‘in’ the image, it’s recommended you use timer release or a wireless shutter release. This will ensure you don’t knock your camera and shake it when pressing the shutter – something to avoid at all costs when shooting long exposures.
The slightest movement of your tripod when shooting a long exposure light painting can have negative effects.
See our guide for more self-portrait ideas here.
7. Don’t Point Your Light Source Directly at the Camera
When light painting, try not to point your light source directly at your camera – this may leave you with a bright white ‘blob’ in your image. That’s not what you’re trying to accomplish!
If you’re using strong flashlights, keep them away from your eyes, since you’ll ruin your night vision, or at least, delay your eyes from getting used to the low light in the scene.
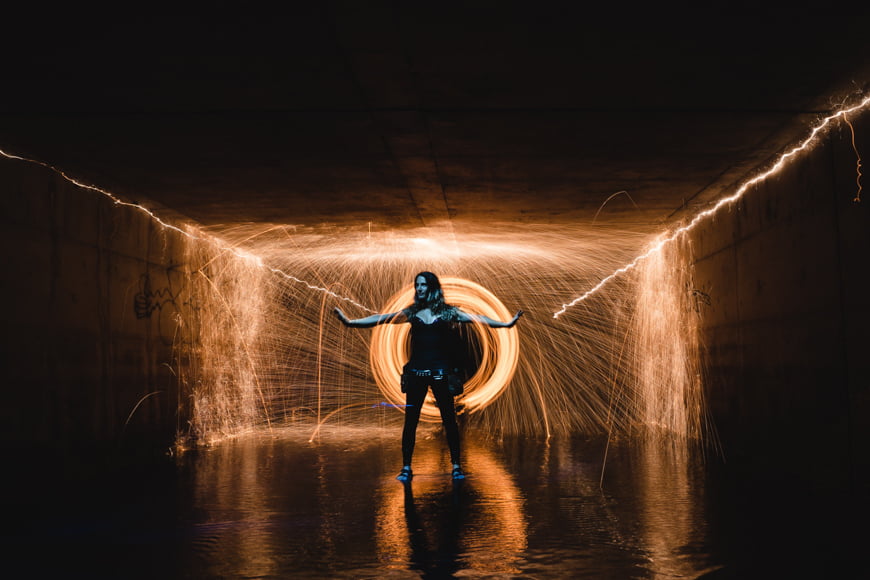
8. Make Sure You Keep Your Light Source Moving

Credit: Joao Bueno
If you’re shooting an ‘on camera light source’ light painting, and the moving light source is held by yourself or anyone else, keep it moving. If you keep it still, the light will really ‘burn into’ your image.
Keep it moving all the time and the light intensity of your light source will be evenly spread in the image.
9. Don’t Get in the Way of Your Camera
If you’re going to be the one moving your light source while your camera is affixed to a tripod, avoid getting in the way.
You can easily block out your light source, so be aware of this with your movements.
10. Try, Try and Try Again!
Credit Patrick Mateer
Don’t expect to get your image right the first time – so take different versions with small adjustments as needed. These may be adjustments to settings, camera position, exposure time or the way you move your light source.
This means you also need to be prepared. If you’re doing shots with sparklers, make sure you bring more than one.
11. Correct Too Much Noise in Post Processing
Credit: Xuan Nguyen
Shooting long exposures can cause more digital noise than you’d like on your files. So try to keep the ISO low. If you are shooting a scene – such as a landscape – with light painting as an added element however, you may want to increase your ISO.
If you do this, you will be able to see more of the overall scene, plus the light painting. If you do have to increase the ISO, try turning on your long exposure noise reduction mode.
If you find you are still getting too much noise, you can correct this in DXO, Lightroom, Photoshop or even a specialist editing programme like DeNoise AI.
12. Use Multiple Light Sources for a Varied Effect
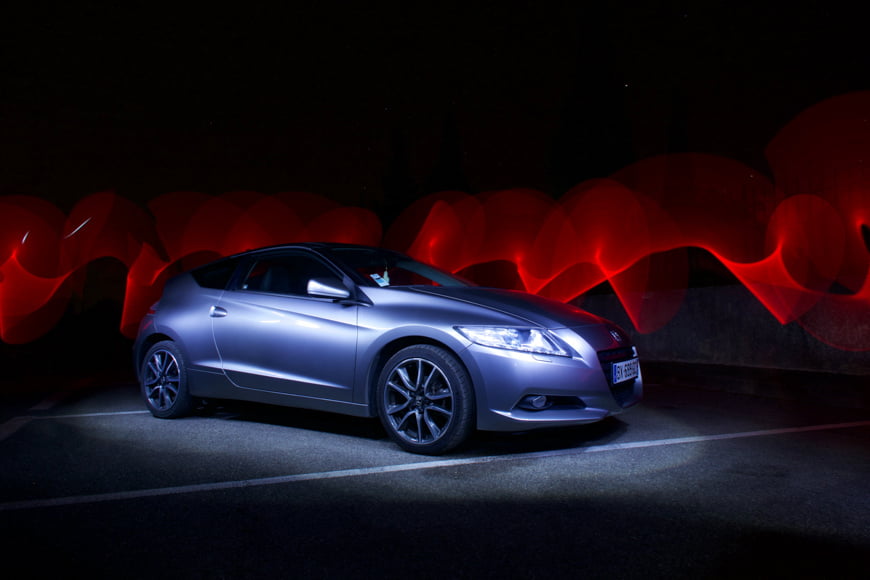
Credit: PM Villa
You don’t always have to shoot in complete darkness. If you’re using a sitter/model in your shot, plus a source of light such as sparklers or string lights, you may want some ambient or artificial light illuminating the subject.
Just ensure this is not too overpowering as the long exposure will intensify it. By coupling ambient light and a light source to paint with can help to create a really arresting image.
This is a good alternative to achieving good exposure without increasing the ISO.
13. Ensure Your Tripod Is on Firm Footing for Long Exposures
Credit: Tom Gainor
Now this may seem like an obvious one, but it’s still important. Ensure your tripod is firmly placed on solid ground – or if you’re shooting on grass, you’ll need to make sure the tripod feet are embedded in a little so it can’t move.
Even more importantly, if you have your camera affixed to a tripod inside a vehicle, double-check it is on tightly and correctly. Only you can determine when you feel it is safe to start shooting – just ensure you take all the necessary precautions.
14. Turn Image Stabilisation off on Your Lenses/Camera
Credit: Xuan Nguyen
Your lenses may have image stabilisation – or if you use a mirrorless camera, you may have inbuilt stabilisation in the camera body. For long exposures on a tripod when light painting, turn your image stabilisation off.
As your tripod is steadying your camera and keeping it still, the image stabilisation is not needed – it can get a bit ‘confused’ and actually cause the reverse effect you are looking for.
So to avoid blurry images, always turn your image stabilisation off when using a tripod.
15. A Torch Can Help You Focus If Shooting in the Dark
Credit: Meagan Carsience
If it’s very dark, focusing can be tricky. So, set your focus to manual, shine a torch (or your phone light) on your subject and then focus from there.
The light will enable you to grab focus manually – if you tried autofocus, your camera will probably be searching for focus forever.
Set your camera to live view and zoom in to check your focus is correct.
And while we are on torches, a headlight or pocket torch will help you to see your camera’s controls in the dark – particularly if you are new to the camera. Also, it will help you not to trip over your tripod (we’ve all done it!).
16. Look for Creative Positions to Shoot from When Capturing Projections
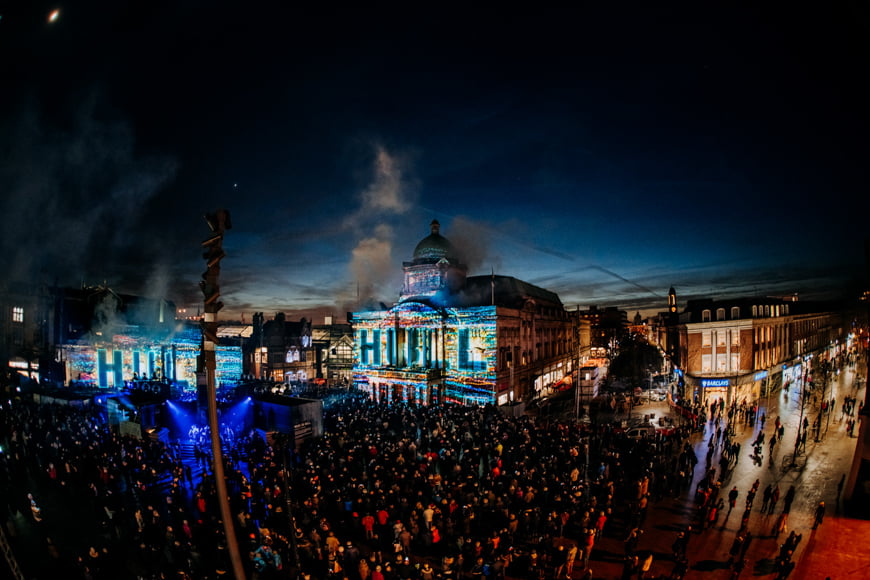
Credit: Patrick Mateer
If you’re capturing a light projection on a building, you’ll need to look for a creative and interesting position to capture your light painting image from.
Light Painting Photography FAQs
How do you do light painting photography?
To do light painting, you need to use a long exposure to capture the path of a moving light source. Set your camera to manual mode and try starting with a shutter speed of around 30 seconds. Keep ISO as low as possible and set your aperture according to the style of shot you want (if in doubt, start at about f/5.6). Then, take your shot.
Can you do light painting with an iPhone?
The easiest and most effective way to paint light with an iPhone is to use an app. You might also like to use a smartphone tripod and remote control. Some apps to check out are Slow Shutter Cam, Night Cap Pro, and Pablo.
What do you use for light painting photography?
You’ll need a camera, a tripod, and a source (or sources) of light. Light sources can be anything from the sun or moon to artificial lights like LEDs, sparklers, flashlights, fire torches, or specialist “light sticks”. A tripod is necessary to prevent camera shake during long exposures.
Final Words
Wherever you start on your light painting journey you will almost certainly have to experiment. Try something out, take some test shots and then read the tips again. You will find you understand them more after you have had a go.
There really is no limit to what you can try with light painting photography. So grab your tripod, grab a torch, start painting with lights and start creating!
It would be great to see examples of your own light painting photography in the comments below. Also, any questions at all, please add them and we will be happy to answer them for you.

Check out these 8 essential tools to help you succeed as a professional photographer.
Includes limited-time discounts.


Patrick Mateer is an award-winning photographer who lives in Yorkshire, England with his wife (wedding photographer Hollie Mateer) and two children.


